In this part of the Qt4 C++ programming tutorial, we will continue
talking about the Qt4 widgets.
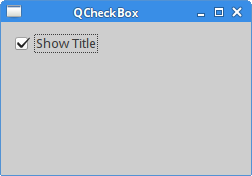
In our example, we display a checkbox on the window. If the checkbox is checked, the title of the window is displayed. Otherwise it is hidden.
QCheckBox
TheQCheckBox is a widget that has two states. On and Off.
It is a box with a label. If the checkbox is checked, it is represented
by a tick in a box.
In our example, we display a checkbox on the window. If the checkbox is checked, the title of the window is displayed. Otherwise it is hidden.
checkbox.h
#ifndef CHECKBOX_H
#define CHECKBOX_H

#include <QWidget>

class CheckBox : public QWidget
{
  Q_OBJECT

  public:
    CheckBox(QWidget *parent = 0);

  private slots:
    void showTitle(int);

};

#endif
This is a header file for our code example.
checkbox.cpp
#include "checkbox.h"
#include <QCheckBox>


CheckBox::CheckBox(QWidget *parent)
    : QWidget(parent)
{
  QCheckBox *cb = new QCheckBox("Show Title", this);
  cb->setCheckState(Qt::Checked);
  cb->move(50, 50);

  connect(cb, SIGNAL(stateChanged(int)), this, SLOT(showTitle(int)));
}

void CheckBox::showTitle(int state)
{
  if (state == Qt::Checked) {
    setWindowTitle("QCheckBox");
  } else {
    setWindowTitle("");
  }
}
We display a checkbox on the window and connect it to the
showTitle() slot.
cb->setCheckState(Qt::Checked);The checkbox is checked, when the example starts.
void CheckBox::showTitle(int state)
{
  if (state == Qt::Checked) {
    setWindowTitle("QCheckBox");
  } else {
    setWindowTitle("");
  }
}
We determine the state of the check box and call the setWindowTitle()
accordingly.
main.cpp
#include "checkbox.h"
#include <QApplication>

int main(int argc, char *argv[])
{
  QApplication app(argc, argv);

  CheckBox window;

  window.resize(250, 150);
  window.move(300, 300);
  window.setWindowTitle("QCheckBox");
  window.show();

  return app.exec();
}
The main file.
Figure: QCheckBox
QListWidget
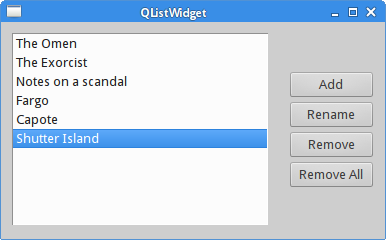
AQListWidget is a widget that is used to display a
list of items. In our example, we will demonstrate how to add,
rename and remove items from the list widget.
listwidget.h
#ifndef LISTWIDGET_H
#define LISTWIDGET_H

#include <QWidget>
#include <QPushButton>
#include <QListWidget>

class ListWidget : public QWidget
{
  Q_OBJECT

  public:
    ListWidget(QWidget *parent = 0);

  private slots:
    void addItem();
    void renameItem();
    void removeItem();
    void clearItems();

  private:
    QListWidget *lw;
    QPushButton *add;
    QPushButton *rename;
    QPushButton *remove;
    QPushButton *removeAll;

};

#endif
The header file for the example.
listwidget.cpp
#include "listwidget.h"
#include <QVBoxLayout>
#include <QInputDialog>


ListWidget::ListWidget(QWidget *parent)
    : QWidget(parent)
{
  QVBoxLayout *vbox = new QVBoxLayout();
  vbox->setSpacing(10);

  QHBoxLayout *hbox = new QHBoxLayout(this);

  lw = new QListWidget(this);
  lw->addItem("The Omen");
  lw->addItem("The Exorcist");
  lw->addItem("Notes on a scandal");
  lw->addItem("Fargo");
  lw->addItem("Capote");

  add = new QPushButton("Add", this);
  rename = new QPushButton("Rename", this);
  remove = new QPushButton("Remove", this);
  removeAll = new QPushButton("Remove All", this);

  vbox->setSpacing(3);
  vbox->addStretch(1);
  vbox->addWidget(add);
  vbox->addWidget(rename);
  vbox->addWidget(remove);
  vbox->addWidget(removeAll);
  vbox->addStretch(1);

  hbox->addWidget(lw);
  hbox->addSpacing(15);
  hbox->addLayout(vbox);

  connect(add, SIGNAL(clicked()), this, SLOT(addItem()));
  connect(rename, SIGNAL(clicked()), this, SLOT(renameItem()));
  connect(remove, SIGNAL(clicked()), this, SLOT(removeItem()));
  connect(removeAll, SIGNAL(clicked()), this, SLOT(clearItems()));

  setLayout(hbox);
}

void ListWidget::addItem()
{
  QString item = QInputDialog::getText(this, "Item",
         "Enter new item");
  item = item.simplified();
  if (!item.isEmpty()) {
    lw->addItem(item);
    int r = lw->count() - 1;
    lw->setCurrentRow(r);
  }
}

void ListWidget::renameItem()
{
  QListWidgetItem *curitem = lw->currentItem();
  int r = lw->row(curitem);
  QString text = curitem->text();
  QString item = QInputDialog::getText(this, "Item",
             "Enter new item", QLineEdit::Normal, text);

  item = item.simplified();

  if (!item.isEmpty()) {
    lw->takeItem(r);
    delete curitem;
    lw->insertItem(r, item);
    lw->setCurrentRow(r);
  }
}

void ListWidget::removeItem()
{
  QListWidgetItem *item = lw->currentItem();

  if (item) {
    int r = lw->row(item);
    lw->takeItem(r);
    delete item;
  }
}

void ListWidget::clearItems()
{
  if (lw->count() != 0)
    lw->clear();
}
We display a list widget and four buttons. We will use these buttons
to add, rename and remove items from the list widget.
lw = new QListWidget(this);
lw->addItem("The Omen");
lw->addItem("The Exorcist");
lw->addItem("Notes on a scandal");
lw->addItem("Fargo");
lw->addItem("Capote);
The QListWidget is created and filled with five items.
void ListWidget::addItem()
{
  QString item = QInputDialog::getText(this, "Item",
         "Enter new item");
  item = item.simplified();
  if (!item.isEmpty()) {
    lw->addItem(item);
    int r = lw->count() - 1;
    lw->setCurrentRow(r);
  }
}
The addItem() method adds a new item to the list widget.
The method pops up a dialog. The dialog returns a string value. We remove
possible white spaces from the string using
the simplified() method. If the returned string is
not empty, we add it to the list widget.
Finally, we highlight the currently inserted item.
void ListWidget::renameItem()
{
  QListWidgetItem *curitem = lw->currentItem();
  int r = lw->row(curitem);
  QString text = curitem->text();
  QString item = QInputDialog::getText(this, "Item",
             "Enter new item", QLineEdit::Normal, text);

  item = item.simplified();

  if (!item.isEmpty()) {
    lw->takeItem(r);
    delete curitem;
    lw->insertItem(r, item);
    lw->setCurrentRow(r);
  }
}
Renaming an item consists of several steps. First we get the current item
using the currentItem() method. We get the text of the
item and the row, where the item is located. The text of the item
is displayed in the QInputDialog dialog. The string that
is returned from the dialog is processed by the simplified() method
to remove potential white spaces. Then we remove the old item with
the takeItem() method and replace it with the insertItem()
method. Finally, the setCurrentRow() selects the new item.
void ListWidget::removeItem()
{
 QListWidgetItem *item = lw->currentItem();

 if (item) {
   int r = lw->row(item);
   lw->takeItem(r);
   delete item;
 }
}
The removeItem() removes a specific item from the list.
First, we get the currently selected QListWidgetItem.
We determine the current row and remove the item using the takeItem()
method. Notice that we manually delete the QListWidgetItem.
void ListWidget::clearItems()
{
  if (lw->count() != 0)
    lw->clear();
}
The clear() method removes all items from the
list widget.
main.cpp
#include "listwidget.h"
#include <QApplication>

int main(int argc, char *argv[])
{
  QApplication app(argc, argv);

  ListWidget window;

  window.move(300, 300);
  window.setWindowTitle("QListWidget");
  window.show();

  return app.exec();
}
Main file.
Figure: QListWidget
QPixmap
QPixmap is one of the widgets used to work
with images. It is optimized for showing images on screen.
In our code example, we will use QPixmap to
display an image on the window.
pixmap.h
#ifndef PIXMAP_H
#define PIXMAP_H

#include <QWidget>

class Pixmap : public QWidget
{
  public:
    Pixmap(QWidget *parent = 0);

};

#endif
The header file for the example.
pixmap.cpp
#include "pixmap.h"
#include <QPixmap>
#include <QLabel>
#include <QHBoxLayout>

Pixmap::Pixmap(QWidget *parent)
    : QWidget(parent)
{
  QHBoxLayout *hbox = new QHBoxLayout(this);

  QPixmap pixmap("bojnice.jpg");

  QLabel *label = new QLabel(this);
  label->setPixmap(pixmap);

  hbox->addWidget(label);
  setLayout(hbox);
}
We show an image of a famous castle located in middle Slovakia.
QPixmap pixmap("bojnice.jpg");

QLabel *label = new QLabel(this);
label->setPixmap(pixmap);
We create a pixmap and put it inside a label widget.
main.cpp
#include "pixmap.h"
#include <QApplication>

int main(int argc, char *argv[])
{
  QApplication app(argc, argv);

  Pixmap window;

  window.move(300, 300);
  window.setWindowTitle("QPixmap");
  window.show();

  return app.exec();
}
Main file.
QSplitter
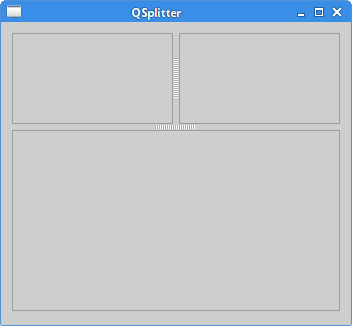
QSplitter lets the user control the size of child
widgets by dragging the boundary between the children.
In our example, we show three QFrame widgets
organized with two splitters.
splitter.h
#pragma once

#include <QWidget>

class Splitter : public QWidget
{
  public:
    Splitter(QWidget *parent = 0);

};
The header file for the example.
splitter.cpp
#include "splitter.h"
#include <QFrame>
#include <QSplitter>
#include <QHBoxLayout>


Splitter::Splitter(QWidget *parent)
    : QWidget(parent)
{
  QHBoxLayout *hbox = new QHBoxLayout(this);

  QFrame *topleft = new QFrame(this);
  topleft->setFrameShape(QFrame::StyledPanel);

  QFrame *topright = new QFrame(this);
  topright->setFrameShape(QFrame::StyledPanel);

  QSplitter *splitter1 = new QSplitter(Qt::Horizontal, this);
  splitter1->addWidget(topleft);
  splitter1->addWidget(topright);

  QFrame *bottom = new QFrame(this);
  bottom->setFrameShape(QFrame::StyledPanel);

  QSplitter *splitter2 = new QSplitter(Qt::Vertical, this);
  splitter2->addWidget(splitter1);
  splitter2->addWidget(bottom);

  hbox->addWidget(splitter2);
  setLayout(hbox);
}
We have three frame widgets and two splitter widgets.
QSplitter *splitter1 = new QSplitter(Qt::Horizontal, this);
splitter1->addWidget(topleft);
splitter1->addWidget(topright);
We create a splitter widget and add two frame widgets into the splitter.
QSplitter *splitter2 = new QSplitter(Qt::Vertical, this);
splitter2->addWidget(splitter1);
We can also add splitter to another splitter widget.
main.cpp
#include "splitter.h"
#include <QApplication>


int main(int argc, char *argv[])
{
  QApplication app(argc, argv);

  Splitter window;

  window.resize(350, 300);
  window.move(300, 300);
  window.setWindowTitle("QSplitter");
  window.show();

  return app.exec();
}
Main file.
Figure: QSplitter
In some desktop themes the splitter might not be visible very
well.
QTableWidget
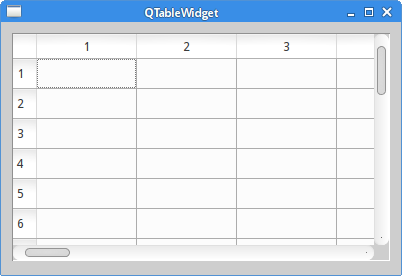
QTableWidget is a unique widget used in
spreadsheet applications. It is also called a grid widget sometimes.
It is one of the more complicated widgets. Here we only display
the widget on the window.
table.h
#ifndef TABLE_H
#define TABLE_H

#include <QWidget>

class Table : public QWidget
{
  public:
    Table(QWidget *parent = 0);

};

#endif
The header file for the example.
table.cpp
#include "table.h"
#include <QHBoxLayout>
#include <QTableWidget>

Table::Table(QWidget *parent)
    : QWidget(parent)
{
  QHBoxLayout *hbox = new QHBoxLayout(this);

  QTableWidget *table = new QTableWidget(25, 25, this);

  hbox->addWidget(table);
  setLayout(hbox);
}
QTableWidget *table = new QTableWidget(25, 25, this);Here we create the table widget with 25 rows and 25 columns.
main.cpp
#include "table.h"
#include <QApplication>

int main(int argc, char *argv[])
{
  QApplication app(argc, argv);

  Table window;

  window.move(300, 300);
  window.setWindowTitle("QTableWidget");
  window.show();

  return app.exec();
}
Main file.
Figure: QTableWidget
In this chapter, we have described several other Qt4 widgets.
No comments:
Post a Comment